
# Create a login client
This guide walks you through creating and configuring a login client in DocCheck Access.
# Prerequisites
- DocCheck User Account
- Company account in DocCheck Access (opens new window)
- Admin rights
# Create and validate a login client
Info
Login clients are always created inside a project. A project should only contain login clients that belong together.
An initial project is created automatically when the company account is created.
Open DocCheck Access (opens new window), select the desired project or create a new one.
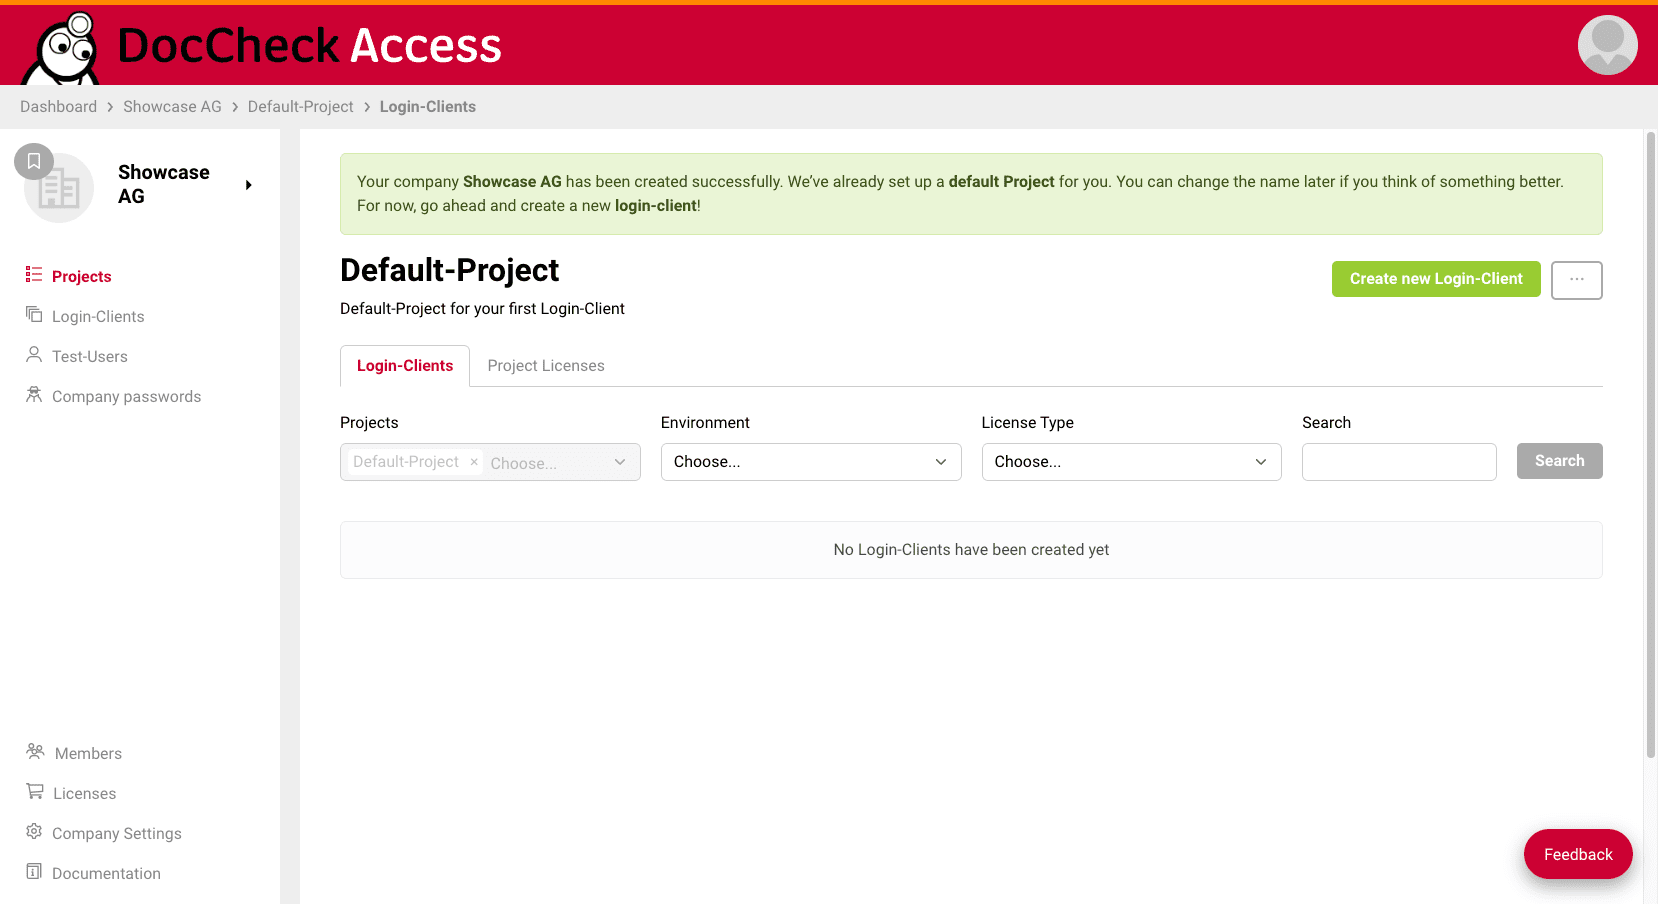
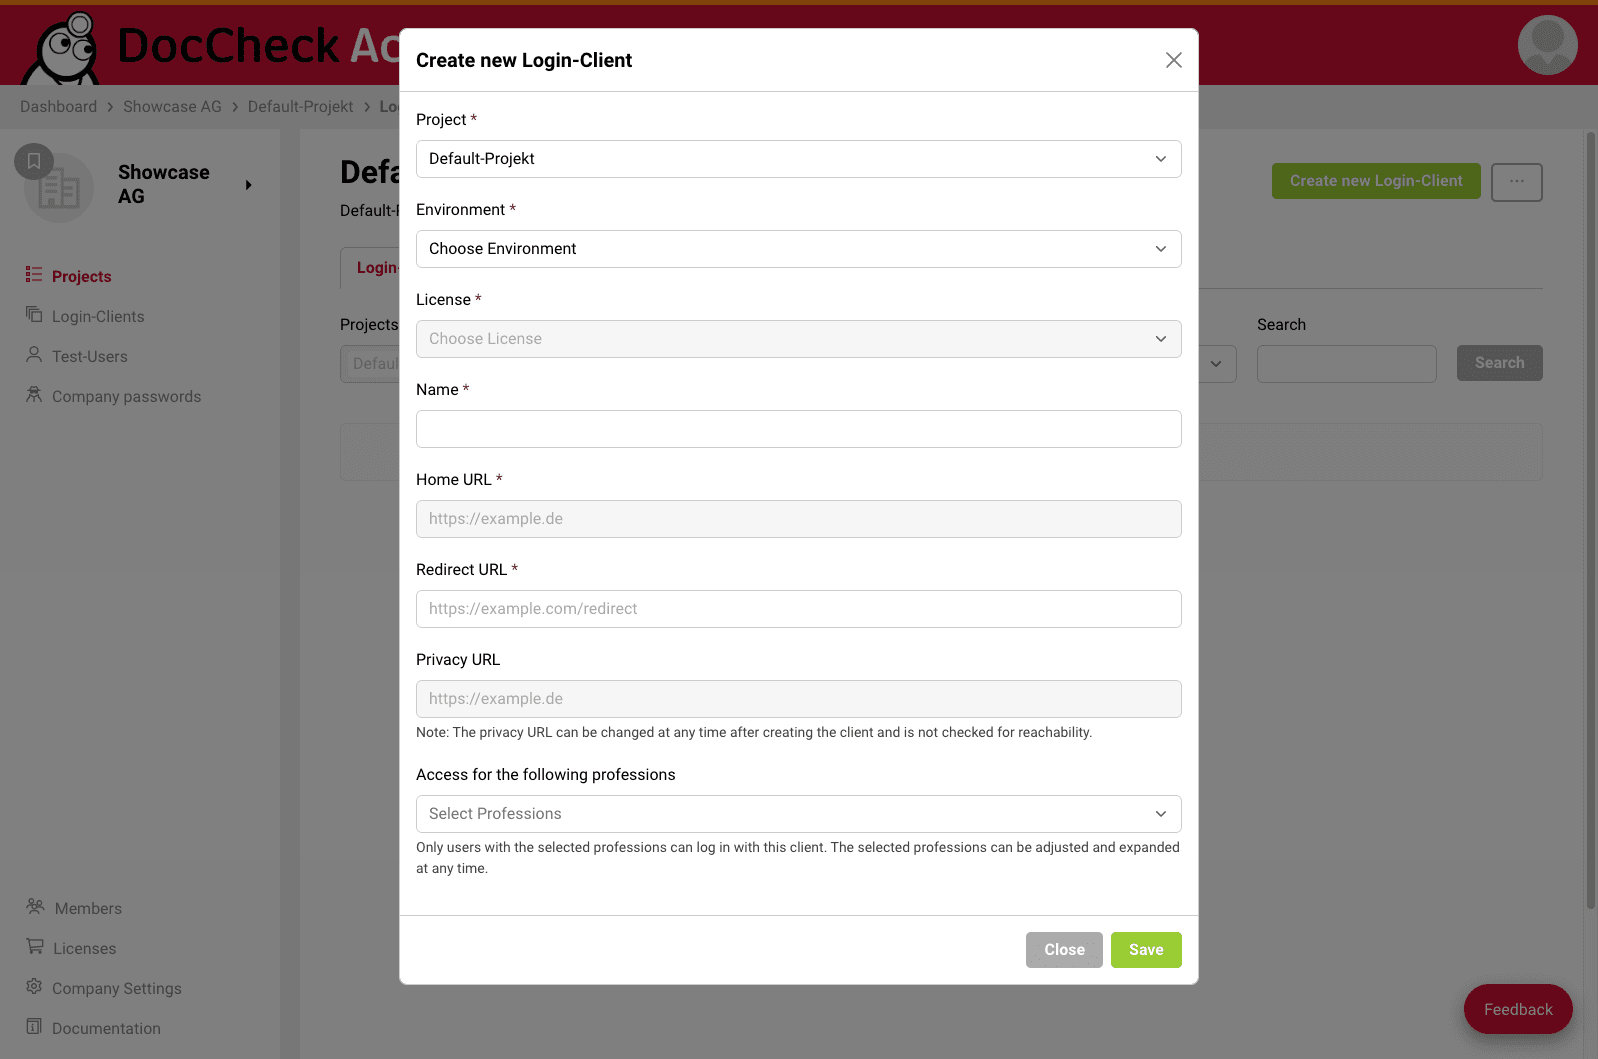
Click "Create new login client", fill out the required fields, and save. Details for each field are listed below in the table Fields at a glance.
After saving, you'll be in the client Settings. You'll also see whether your client is active and valid.
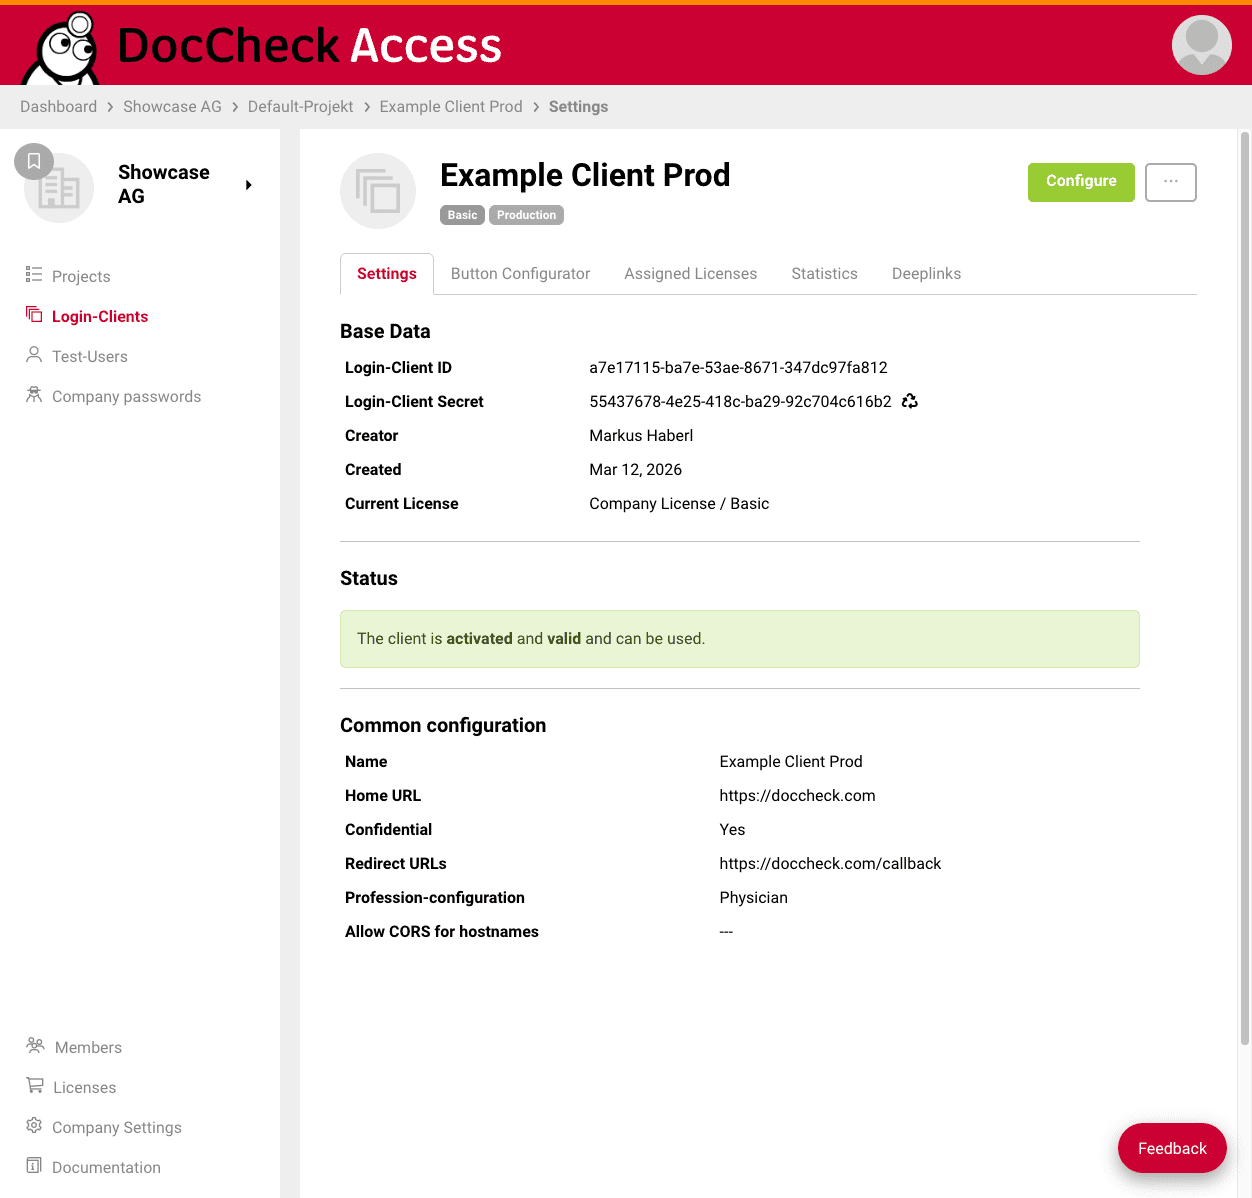
You can change the client settings anytime via the Configure button.
# Regenerate the client secret
You can regenerate the client secret of a login client yourself in DocCheck Access. After a new secret is generated, the old secret remains valid for several hours. This gives you time to replace the secret in your application and test the login without immediately breaking existing integrations.
Important
Treat both the old and the new client secret as confidential. The secret must only be stored and used server-side.
# Process
- Open the detail page of the relevant login client in DocCheck Access (opens new window).
- In the client settings, click the recycle icon next to the client secret.
- Click “Regenerate”.
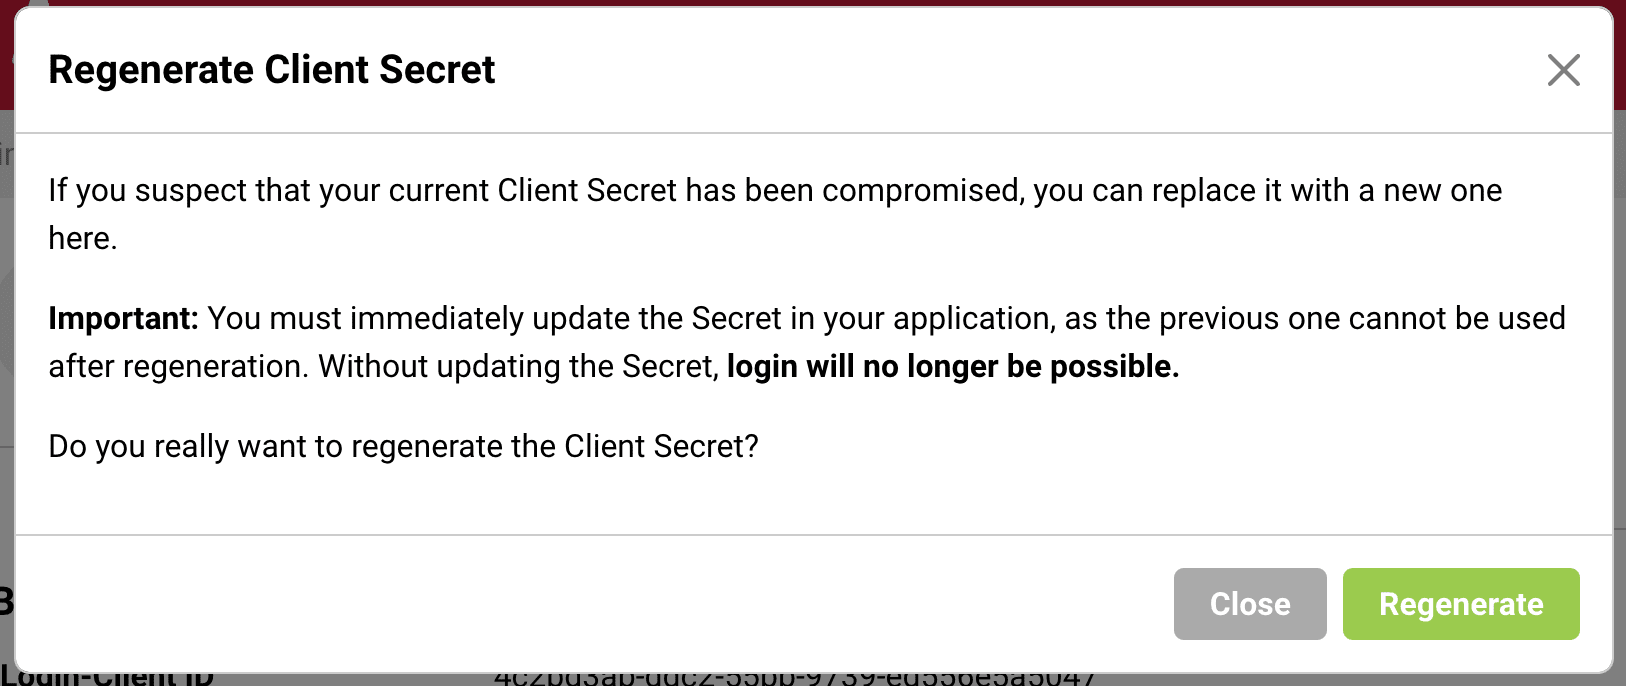
- DocCheck Access generates a new secret. The old secret remains usable for a few hours.
- The new secret is shown on the login client detail page together with a note.

- Replace the secret in your application.
- Test the login once afterwards.
Recommendation
Plan the replacement so that your development or operations team can store the new secret in the application and test the login shortly afterwards.
# Fields at a glance
| Field | Description |
|---|---|
| Project | The login client always belongs to exactly one project. Projects group clients that logically belong together (e.g., per website/product). A default project is created automatically when the company account is created. |
| Environment (prod or dev) | dev: development/test environment. prod: production environment. Choose the environment first; additional fields/options may appear accordingly. |
| Select license | Basic:
Not sure? Start with Basic; you can assign/switch a license later. For Personal and scopes, also see Personal, scopes & consent. |
| Name | Clear, unique name for recognition (e.g., “Product A – DE – Professional info”). |
| Home URL | Start/landing page of the protected area; for orientation/documentation in the UI. |
| Redirect URL | Target address for redirect after successful login. Dynamic targets are not controlled via redirect_uri but via state (optional in combination with redirectUri). Details: Redirect & State flow. For Basic, typically use the main domain rather than a full final URL. |
| Confidential | Enable this option for confidential applications with a secure backend. The client_secret must only be stored and used server-side. Public clients such as browser apps or mobile apps must not expose a secret publicly. Details: PKCE. |
| Allow CORS for hostnames | Allows JavaScript requests from a specific browser origin to DocCheck API endpoints. Enter only scheme, host, and optional port, for example https://example.com or https://localhost:8080. |
| Privacy policy URL | Public URL to your privacy policy (linked in the flow). For Economy/Business clients, make sure the privacy policy matches the requested scopes. Details: Configure the consent form. |
| Access groups | Defines which verified professional groups may pass the login client. Only users in these groups can log in successfully. |
# Next steps
- Basic clients: continue with the button implementation. Details: Configure login button.
- Economy/Business clients: review the consent setup before finalizing the button configuration. The selected license, privacy policy URL, requested Personal scopes, and button configuration work together. Details: Configure the consent form.