# Configure login button
This page explains how to configure your client and use the Button Configurator to implement the DocCheck Login button in your application.

DocCheck Login is implemented as a login button. In DocCheck Access (opens new window) you'll find a script and an HTML element that renders the login button.
# Prerequisites
Before embedding the button, first create and configure a login client in DocCheck Access. A step-by-step guide: Create login client.
# Button configurator
Next, prepare the login button for embedding into your target page. Use the Button Configurator to generate the HTML markup for the button.
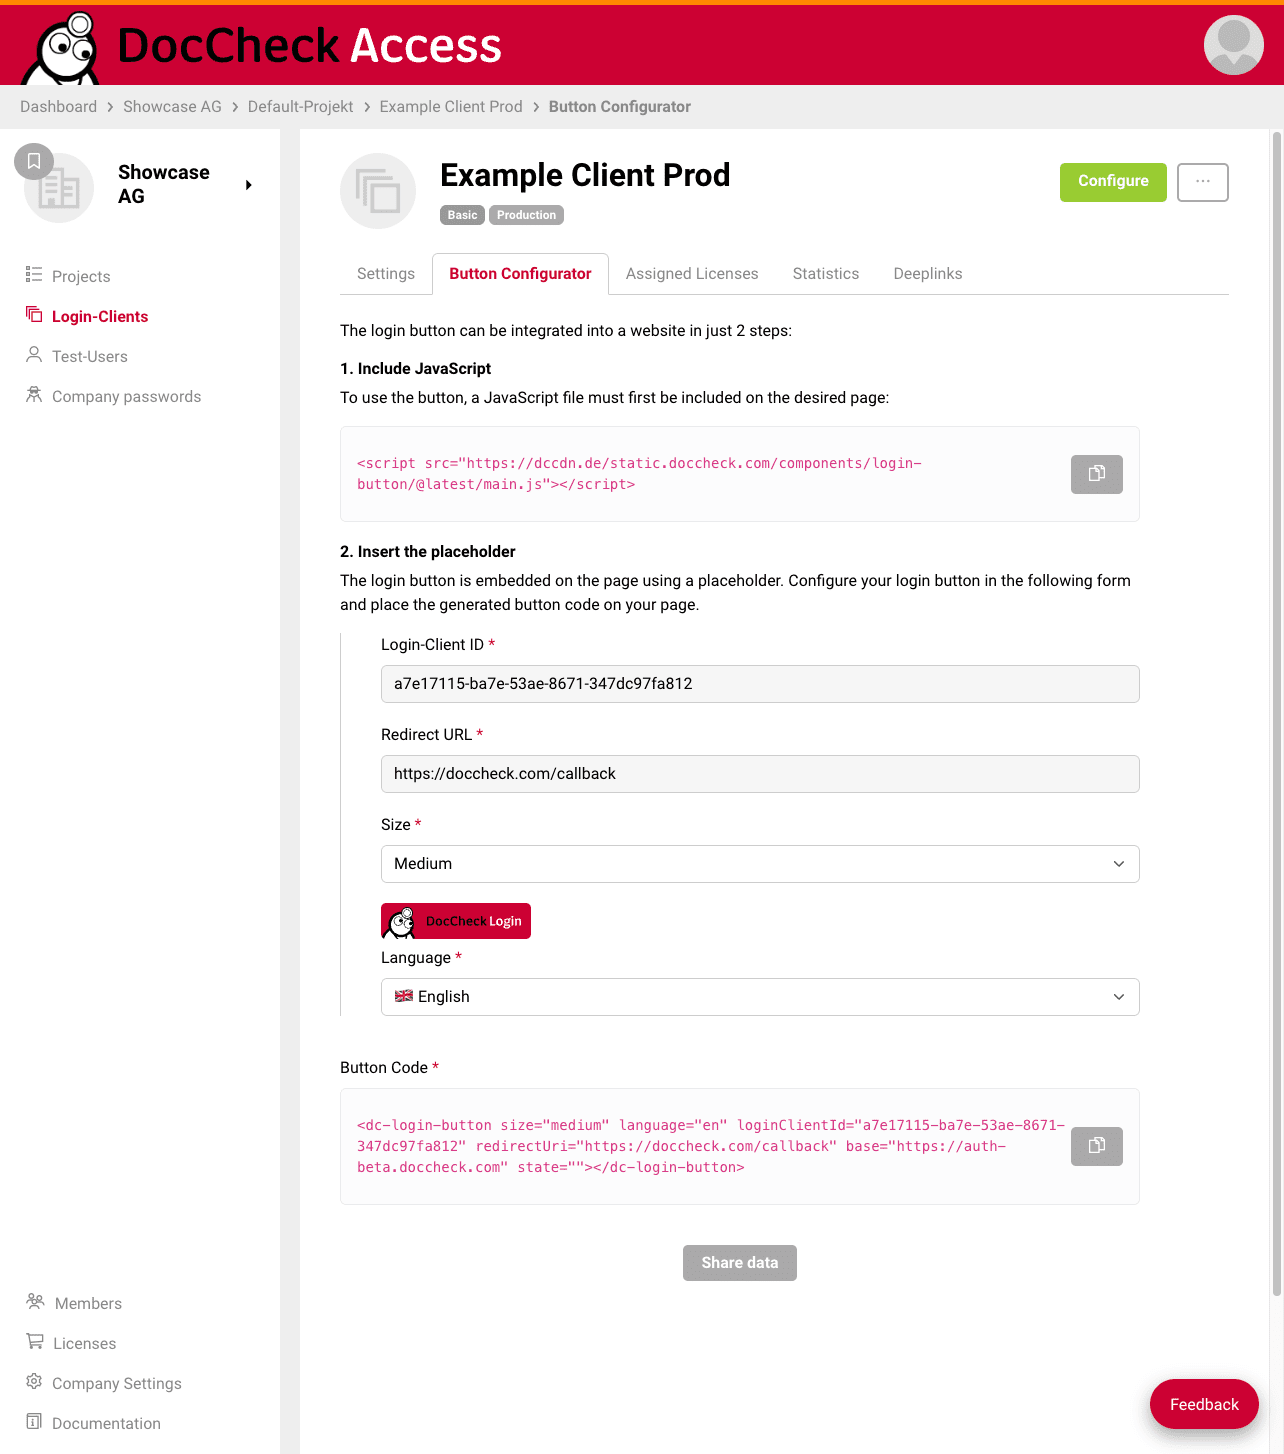
# 1. JavaScript integration
In the first block, you'll find the URL for the JavaScript required by the login button.
This is a Latest Script that automatically updates to the newest version of the login button. You don't need to update the script URL with every release, as it always points to the latest version.
<script src="https://dccdn.de/static.doccheck.com/components/login-button/@latest/main.js"></script>
# 2. Configure placeholder
The configurator itself is a form where you set the properties for the generated markup.
Besides Redirect URL, Button size, and Login language (of the login process), you can select the feature Personal (scopes/user data) starting with the Economy license. More details: Create login client.
For Economy/Business clients, review the consent configuration before copying the final markup. The selected scopes determine which data the user can consent to. Details: Configure the consent form.
Each scope represents specific user data that your target application can request during the process.
Note: Users must consent to the selected scopes. Only for scopes with an explicit consent can user data be retrieved during the OAuth flow.
The state parameter helps restore or verify a particular application state after successful login.
In the last section, you'll find the button markup that updates live as you change the form inputs.
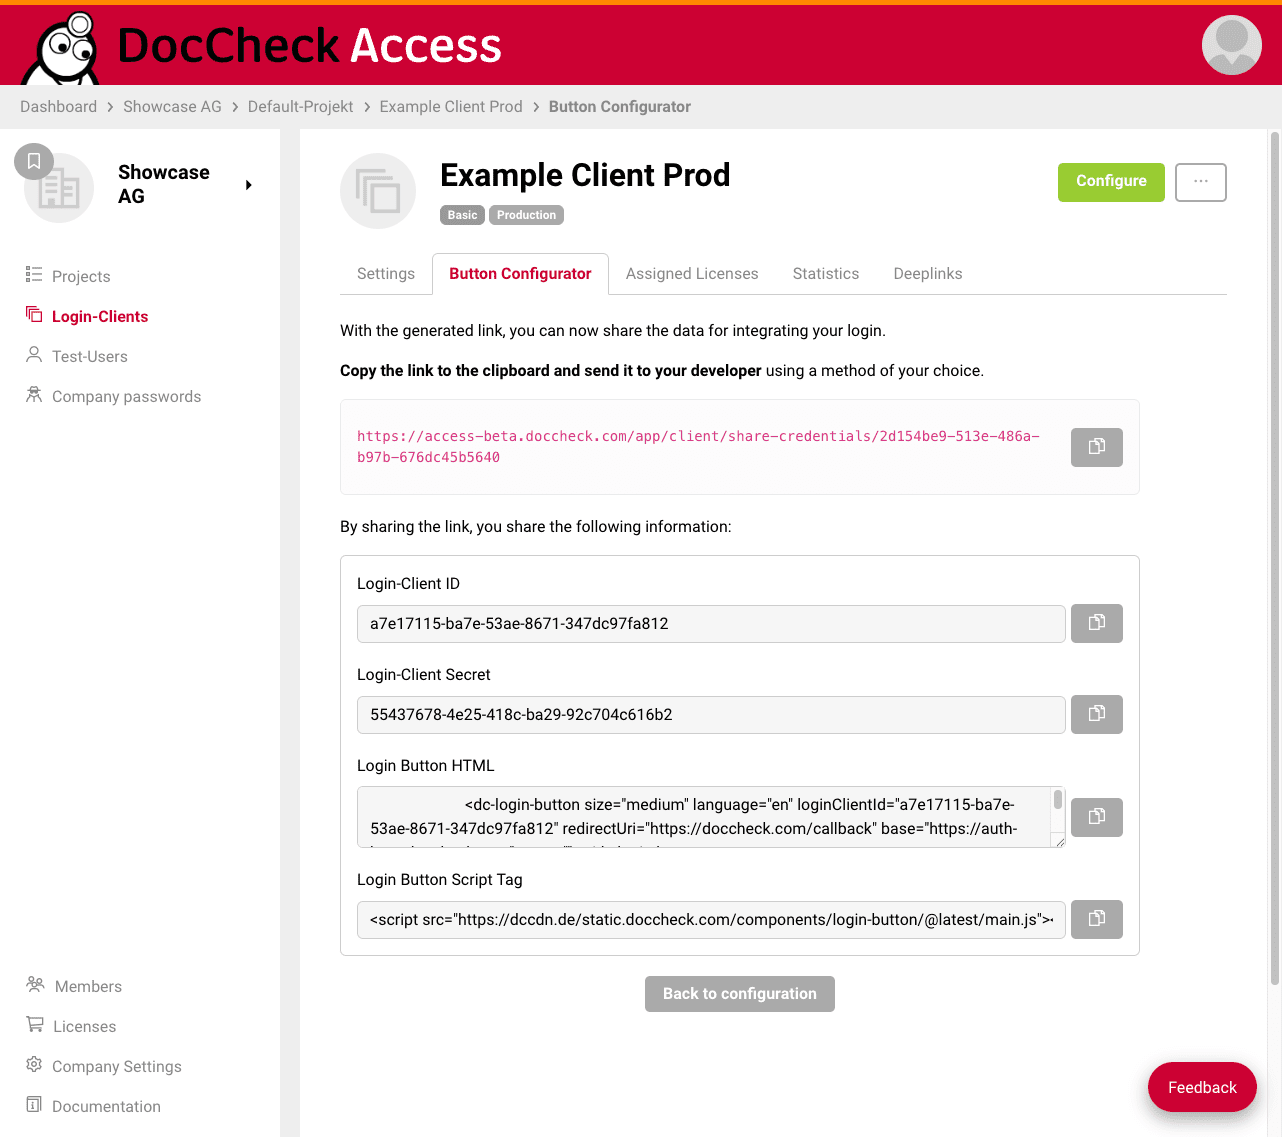
After finishing the configuration, use the copy-to-clipboard button to copy the markup.
There is also a "Share data" option that shows a summary of all relevant data and generates a temporary link you can send to your developer to share all required information and credentials.